Making your own wax food wrap will allow you to replace the use of plastic to wrapped little pieces of food or cover bowls to store in the fridge. You can use to pretty much anything as long as it works for you.
Before to buy anything, please consider how many wax wraps you want to make. The first time I decide to make a big one 20 x 20 cm., two medium ones of 10 x 15 cm. and two small ones of 8 x 8 cm approx.
MATERIALS & TOOLS
20 x 20 cm. of 100% natural/plant-based fabric like cotton or hemp. If you have a piece of clothe that you no longer use, consider to reuse what you already have.
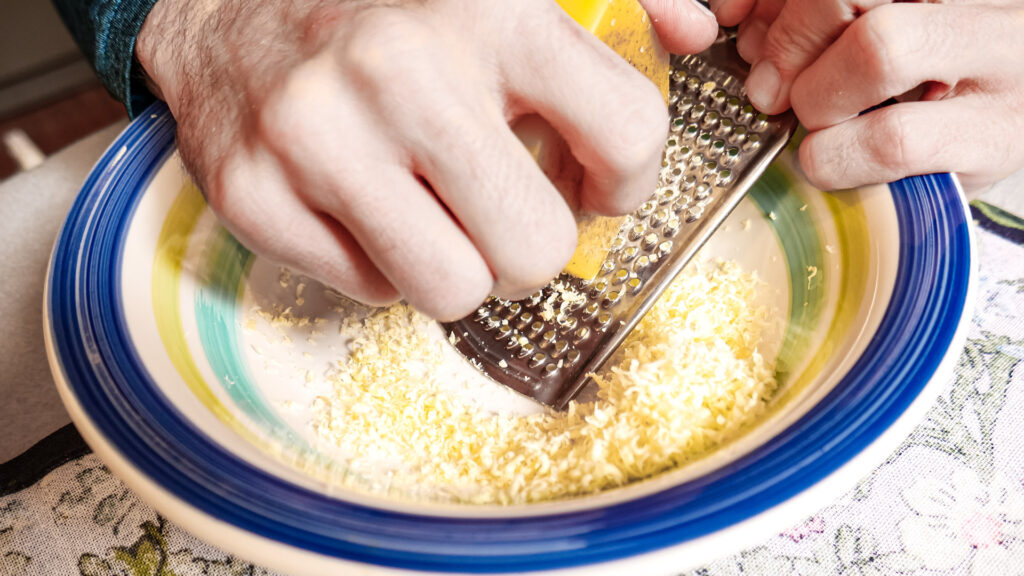
1 Grater. To grate your bees wax.
3 tbsp. of shredded bees wax. This amount is only for 20×20 cm. of fabric. Change accordingly.
Parchment paper, any paper or aluminum foil. Just consider that aluminum foil needs to be clean to be recycled. So it’s probably better to use paper.
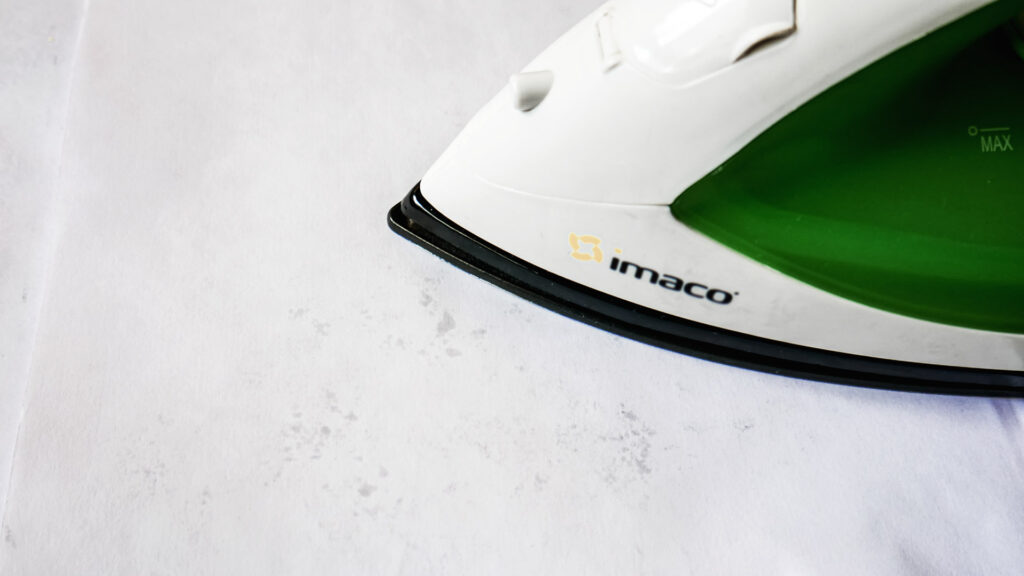
Iron and safe surface to iron your fabric.
Scissors (only if you want to customize the size of your wraps for different purposes).
INSTRUCTIONS
1.
Cut your fabric at your desired size. If you have a very long piece, I recommend you to cut it to 20×20 cm. or a workable size.
2.
Grate your bees wax accordingly to how many wraps you want to make.
3.
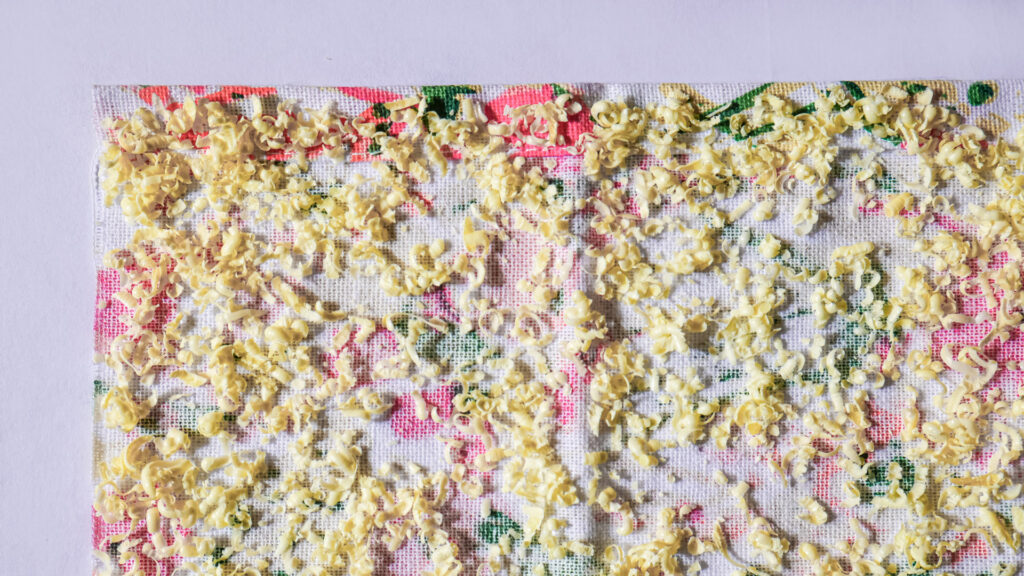
Place your fabric on top of some paper to protect the area you are working on. When your fabric is in position, spread the grated beeswax along the surface. One tip is to make sure to put a little extra wax at the edge of the fabric because these parts are very hard to fill and are the ones that will hold the structure of your wrap when you use it.
4.
Place another piece of parchment paper and put it on top of the fabric that has the wax on it. Take your heated iron and slowly pass it around. Don’t go to fast to make sure the wax has time to melt and attach to the fabric.
If you are using normal paper, just make sure to around three sheets of paper to make sure your iron doesn’t get waxy.
5.
Remove the paper to observe if all the surface is covered in wax. If you feel that you need to add a little bit more of wax, go ahead. Once your fabric is done, let it cool.
HOW TO WASH IT
Wash it by hand with cool or warm water. Be gentle with your wrap and avoid using hot water. Let it dry and store it normally.
If you make your own wax wrap, I would love to see it 💚 Share it on instagram and tag @promadiktravel
If you want to try other zero waste hacks & tips for travelers and digital nomads, check the full list here.
Welcome to this special place! Here I’m choosing to express my artistic side, share some ideas and what I’m constantly learning of life as a medicine woman and digital nomad.


Leave a Reply